Christmas Cake
Christmas Cake
to your Favourites...
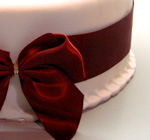
This spiced Christmas classic is made with an abundance of dried fruit and (if you so choose) loaded with brandy. It is usually made several months in advance and significantly benefits from being matured.
Ingredients
- For the cake:
- 750g mixed dried fruit
- 200g glacier cherries
- 100g mixed peel
- 100g caster sugar
- 150ml red wine
- 100ml brandy
- Zest of 1 lemon
- 40ml lemon juice (1 lemon)
- Zest 1 orange
- 160ml orange juice (1 orange)
- 6 cloves
- 3cm cinnamon stick (or ½ teaspoon ground cinnamon)
- 225g self raising flour
- 200g soft unsalted butter
- 200g soft brown sugar
- 100g ground almonds
- 2 tablespoons black treacle
- 4 eggs
- 1 pinch of salt
- 2 teaspoons mixed spice
- 1 teaspoon ground cinnamon
- 3 × 150ml brandy to feed the cake
- For the glaze:
- 100g apricot jam
- 2 tablespoons water
- 1 tablespoon lemon juice
- For the icing:
- about 500g marzipan
- about 500g fondant icing
Preparation Time: 1 hour + 12 hours marinading
Cooking Time: 2 - 3 hours
Serves: 10
Method
- Remove the zest from the orange and lemon with a vegetable peeler and juice the insides.

- In a saucepan, put the red wine, brandy, cloves, cinnamon stick, orange zest & juice, lemon zest & juice, black treacle and the caster sugar.

- Bring this mixture to the boil and stir it to dissolve the sugar. Turn down the heat and simmer it until the liquid has reduced by ½. Then remove it from the heat and leave it to infuse for 1 hour.
- After the hour, pour the liquid through a fine sieve into another pan (discarding the solids in the sieve), add the dried fruit, glacier cherries and mixed peel to the liquid and bring it back to the boil. Boil it for 1 minute, then turn off the heat and give it a good stir.

- Leave the mixture to cool down, pour it into a bowl, cover it with a piece of cling-film/plastic-wrap and leave it over night in a cool place, but not in the fridge. (Doing this helps the fruit absorb the liquid which keeps the cake very moist while not making the mixture too wet.)
- The next day, preheat the oven to 170°c and place a baking tray on the middle shelf to heat up.
- Cut out 2 disks of greaseproof paper the same size as the inside of your cake tin (which should be about 22cm in diameter) and 1 long rectangle of greaseproof paper that is 6cm wider than the height of the cake tin and slightly longer than the circumference of the tin.
- Fold over a depth of 3cm of one of the long edges of the rectangle of greaseproof paper and make 3cm diagonal cuts into it all the way along its length.

- Grease the inside of your cake tin with butter or vegetable oil and put in one of the disks of greasproof paper. Then grease the top of the disk and put in the long greaseproof paper rectangle around the inside of the tin with the cut flaps lying on the bottom of the tin. Grease the inside of the greaseproof paper rectangle and put the last disk into the tin, sandwiching the "feet" of the upright greaseproof paper rectangle. Finally, grease the top of that greaseproof paper disk. (The main aim here, as you might have guessed, is that we don’t want the cake to stick to the tin.)
- Wrap a piece of damp newspaper around the outside of the tin and secure it with string (this protects the outside of the cake from burning during its long cooking time).

- Put the soft butter and brown sugar into a large mixing bowl.
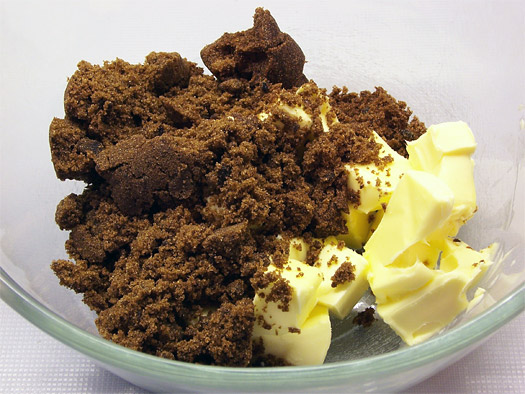
- With an electric whisk, mix them together until they have turned light in colour.
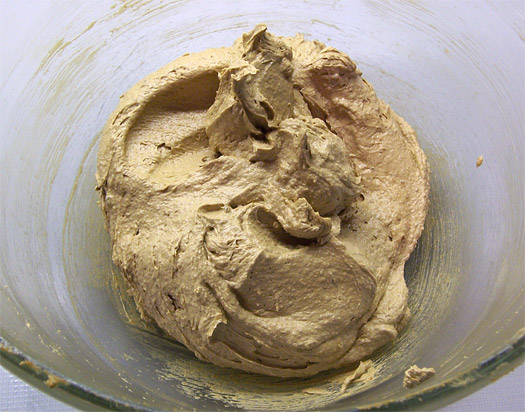
- With the whisk still running, add the beaten eggs in a steady stream to the butter and sugar mixture. Then sieve the flour, salt and spices into the bowl, fold it all together and then add the ground almonds.

- Fold in the ground almonds and then pour in the dried fruit mixture that was sitting overnight and stir them in. (It is usually at this point that you realise the bowl you have been using is far, far too small for the job, despite it being the largest bowl you own. This will always happen. Don’t worry, it’s normal.)
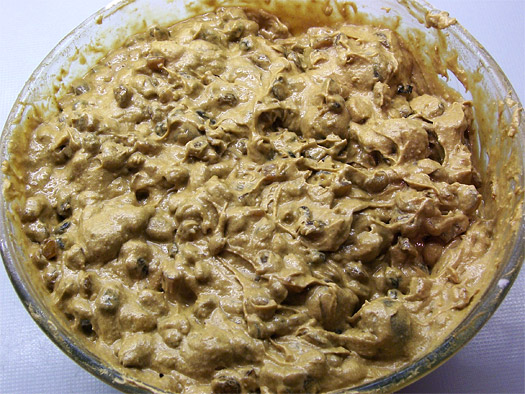
- Pour the cake mixture into the prepared tin and firmly tap it on a work surface to remove any air bubbles in the base of the tin.
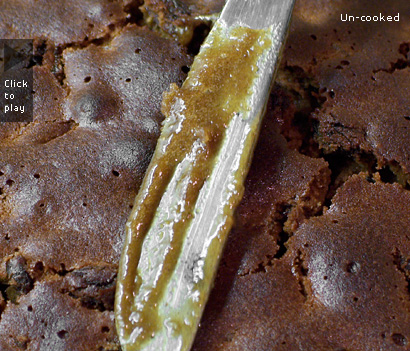
- Put it into the oven and bake it for 2½ to 3 hours. Test to see if the cake is cooked by sticking a thin knife into the middle of the cake. If the knife comes out clean the cake is cooked, if not the knife will come out with raw cake mix on it. If the cake needs further cooking but the top appears to be getting too dark, simply put a piece of tin foil on the top, shiny side up.
- Remove the cake from the oven and leave it in the tin to rest and become cold. Then, cover the top with a piece of tin foil or the base of another, similarly sized cake tin, and leave the cake in a cool dark place to mature for 2 weeks. If the top of the cake has domed, put a weight on it to flatten out the top of the cake.
- After 1 week, use a skewer to stick the cake full of holes spaced about 3cm apart, then pour 150ml of brandy evenly over the cake. Continue feeding the cake with brandy every week for three weeks.

- Make the apricot glaze by placing the apricot jam, water and lemon juice into a small pan and bring it to the boil stirring all the time. Then pour this into a bowl through a sieve to remove any lumps.

- Remove the cake from the tin, peel away the greaseproof paper and set the cake on a chopping board.
- Paint the top and sides of the cake with an even layer of the apricot glaze.
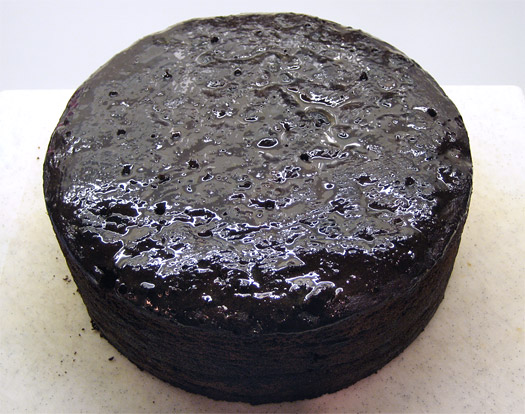
- Dust the work surface with icing sugar (like you would with flour if you were rolling out pastry dough) and roll out the marzipan with a rolling pin to a thickness of about 5mm. Carefully roll up the Marzipan around the rolling pin and drape it over the glazed cake, then smooth down the sides and trim off the excess. Paint the Marzipan with the remaining apricot glace.
- Before you roll out the fondant icing make sure the work surface is spotless because the white fondant will show any speck of dirt it picks up which would ruin the final result. Dust the work top with more icing sugar and knead the fondant icing for about 5 minutes until it is soft (this prevents the icing from cracking or splitting when it is rolled out).
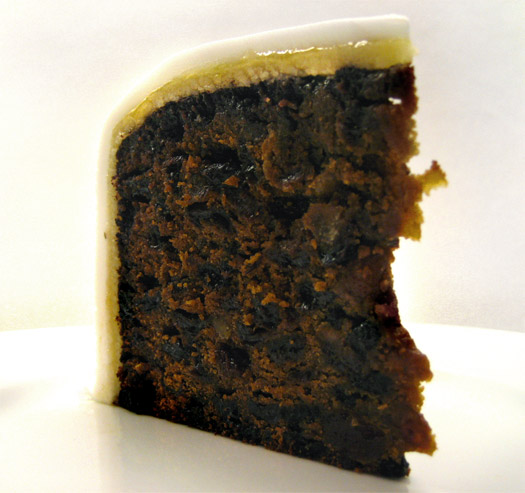
- Place the glazed cake on to a cake stand, a decorative cake board or a plate (a nice plate). Roll out the icing to a thickness of about 5mm, then carefully roll up the icing around the rolling pin and drape it over the glazed cake smoothing down the top and sides. Trim off the excess icing leaving a step then, using the back of a fork or a patterned cutlery handle, press indentations into the step, (this results in a pretty design around the cake). Tie a ribbon around its waist (you can optionally decorate the top in any way you like using the excess icing).
- Serve.
Useful Information
Can it be frozen? Yes.
Can it be prepared in advance? Yes, it can be finished up to 6 months in advance if stored properly.
Will leftovers be nice? Yes, for up to 6 months from the day it is made.
Notes
- To store the cake, it should be kept in an airtight container in a cool, dark place.
- As an alternative, you can decorate the cake at stage 20 using 500g mixed dried fruit and nuts, 200g caster sugar and 2 tablespoons of water. Place the nuts and dried fruit into a large mixing bowl and the sugar and water into a small saucepan over a medium heat. Dissolve the sugar stirring all the time then, when the sugar has dissolved, turn up the heat as high as it will go and boil the sugar syrup for 2 minutes until all the water has evaporated (no steam) and the bubbles are getting bigger (it needs to reach a temperature of 115°c). Immediately pour the sugar syrup over the fruit and nut mixture, stir it with a spoon until it has thoroughly combined and then carefully pour this on top of the cake.
Sponsored Links

