Chicken Kiev
Chicken Kiev
to your Favourites...

The classic chicken dish of breadcumbed chicken breast stuffed with garlic butter. It is, contrary to popular belief, not from Kiev but is actually of French origin.
Ingredients
- 1 × chicken breasts
- 1 egg
- about 2 tablespoons plain flour
- about 5 tablespoons dried breadcrumbs
- 30g unsalted butter (at room temperature)
- 1 small clove of garlic
- 1 teaspoon chopped parsley
- 3 tablespoons of vegetable oil
Preparation Time: 45 minutes
Cooking Time: 20 minutes
Serves: 1
Method
- Allow the butter to come to room temperature or put the butter into a bowl and soften it in the microwave for 10-15 seconds. It needs to be soft but not liquid.
- Crush the garlic using a garlic press or finely chop the garlic, form it into a small pile, sprinkle it with a pinch of salt and purée it by scraping it with the flat of a knife. Then finely chop the parsley.
- Add the garlic and parsley to the butter, season with pepper (no salt) and thoroughly mix it all together.
- Place the garlic butter near the edge of a piece of cling-film/plastic-wrap, and fold the edge over.

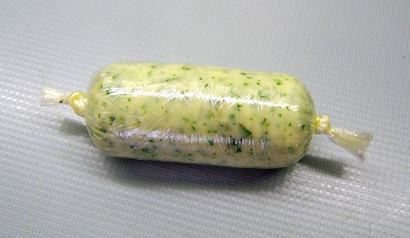
- Tightly roll up the butter into a sausage and tie both ends (you are aiming for a sausage about 2cm in diameter and 7cm in length). Then put the butter into the freezer for 30 minutes.
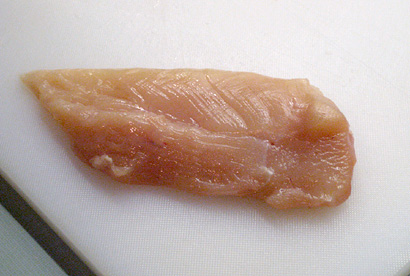
- Place the chicken breast on to a chopping board, smooth-side down and remove the false fillet (the detachable part on the back of the breast) if it has one.
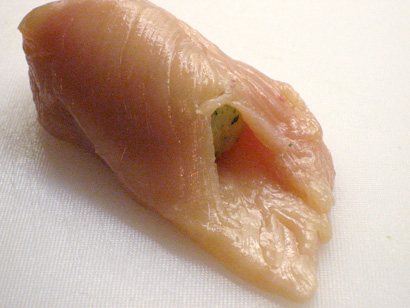
- Take a long, thin, sharp knife and position it about 3cm up from the thin end of the breast. Then, holding the knife horizontal, push it up the chicken breast towards the thick end until it is about 1cm from the end. Take care not to puncture the breast, you are trying to make a cavity the same size as the stick of garlic butter.

- Take the butter out of the freezer, unwrap it and push it into the cavity inside the chicken breast. It may require some force to get it all the way into the cavity but take care not to split the breast. If the butter is too big to fit, just trim off some of the butter to make it thinner.
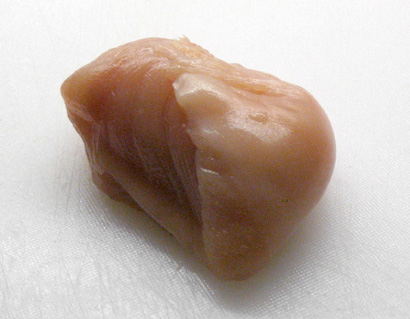
- Using a meat hammer, rolling pin or just your hand, bash out the thin part of the breast in front of the cavity to make a flap and fold this up, over the entrance to the butter cavity. Firmly smooth down the flap of chicken to make sure there are no gaps.
- Pre-heat the oven to 200°c.
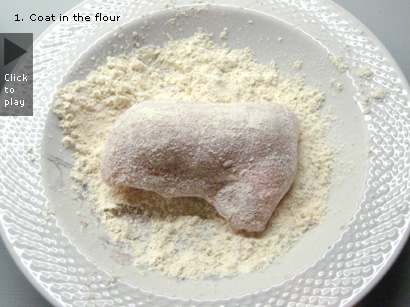
- Put the flour on a plate and season it with salt & pepper, beat the egg in a bowl and put the breadcrumbs onto another plate.
- Gently roll the kiev in the flour to completely coat it, patting off any excess, then coat it in the egg before rolling it in the breadcrumbs. Coat it in the egg again and then roll it once more in the breadcrumbs to give it a second coating.
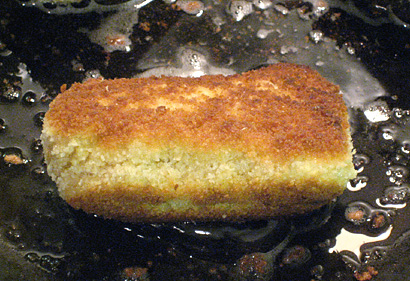
- Heat the oil in a frying pan over a medium heat and then put in the kiev. Fry it on all sides until it has turned golden brown. Be aware that breadcrumbs can turn brown surprisingly quickly.
- Transfer the kiev to a roasting tin and put it in the oven for 15 minutes.
- Serve.

Useful Information
Can it be frozen? No.
Can it be prepared in advance? Yes, up to 1 day to stage 12 (they can also be frozen at stage 12).
Will leftovers be nice? Yes, for up to 3 days.
Notes
- You can stuff the breast with any thing you like. This method suits a filling that becomes liquid when hot because it creates a sealed cavity. For a filling that becomes solid when cooked, the best method to use is that for the stuffed chicken breast.
Sponsored Links

Recipe Options


Units of Measurement